

I saw headbands similar to this style in a mail flyer, and wondered if I could make them easy and inexpensively. Mine are more funky and less fancy, but just as fantastic! I am not a pattern writer, so use these instructions at your own risk. If you are smart enough to follow them, you are probably smart enough to make up your own pattern, so make as many of these headbands as you want, just don't sell the pattern!
Here is how to make your own. (Pictures follow each step:
1. You will need 2 strips 2.5" wide by WOF for your headband, 1 strip 2.5" wide by WOF for your flower, enough fusible fleece for a 2.5" x 40" piece (can be pieced together), and a scrap of green for your leaves. You will also want matching thread.

2. Layer your two main strips together, still folded in half, with the fold at the same end and lined up together. Using your ruler and rotary cutter, cut the long sides at a slightly tapered angle by lining the ruler up with the folded top corner and in about 1/4" from each bottom corner. Then, cut the selvages off straight across the end.


3. Using one of these angled strips as a pattern, cut single sided fusible interfacing to cover 1 strip. Since my fusible interfacing is 20" wide, I cut two pieces and butt them up in the center of the band before ironing. Because you will be ironing them on, plus sewing around them, you don't need to have the interfacing all in one piece.
4. Iron the fusible interfacing to the WRONG side of one ofyour headband strips.

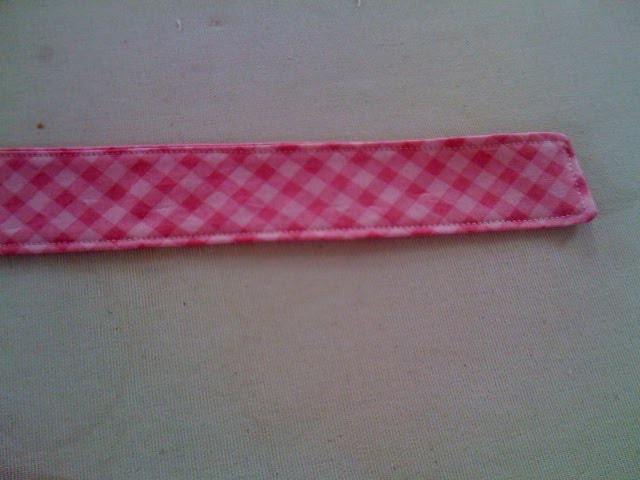
5. Layer both headband strips, one with interfacing and one without, together with right sides facing. Sew around using a 1/4" seam allowance and leaving about 5" for turning on the center of one long side. Clip the corners at each end.

6. Turn the band right side out, one half at a time. Iron the band, making sure to press all seams out with no folds. Top stitch around the entire band, 1/8"-1/4" in.

7. Taper the 2.5" strip for the flower. This doesn't have to be very exact, just taper it to a slight point. You might also want to cut this strip down in length to about 30" for a less bulky flower.

8. Cut 2 or 3 leaves from your green scrap. I just eyeballed mine by cutting two intersecting arcs.


9. Take the flower strip and fold it accordian style. This may take some pratice to get it just like you want it, and you want your accordian to be messy. Once you're satisfied with it, sew it in the center to hold it.


10. Place your flower on your headband by trying it on and seeing exactly where you want it to be on your head. I like mine just to one side or the other. Once you like your placement, sew the flower to the band by just sewing a 1/2" line in the center and then backstitching. Then, add the leaves by sewing around them and then up the middle with a straight stitch.

Congratulations! Your headband is ready for wear! Tie and enjoy.

